In today’s world, ensuring the safety of your home or business is more important than ever. One of the most effective ways to enhance security is by installing tapo camera. If you’re considering installing them yourself, this guide will take you through the process step-by-step.
For a variety of reliable security camera options, check out CCTV Wise.
Why Choose DIY Security Camera Installation?
Installing your own security camera system can save you time and money. DIY installation allows you to customize the setup according to your preferences and ensures you’re fully aware of your system’s capabilities.
What You’ll Need
Before starting, gather the following items:
- Security cameras
- Power cables (if not wireless)
- A compatible DVR or NVR (if applicable)
- A ladder
- Drill and mounting equipment
- Screws and anchors
- Internet connection for smart cameras
- Smartphone or computer for setup
Step 1: Plan Your Camera Placement
Begin by identifying the most vulnerable areas of your property. Common spots for security cameras include:
- Main entrances (front and back doors)
- Driveways and garages
- Windows that are not facing a busy street
- Side gates or alleys
- Large outdoor spaces like gardens or patios
Ensure the cameras have a clear, unobstructed view and are installed at a height that prevents tampering.
Step 2: Choose the Right Security Cameras
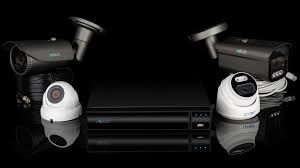
There are several types of security cameras to choose from:
- Wireless cameras: Easy to install and connect to Wi-Fi.
- Wired cameras: Reliable with no interference but require more setup effort.
- Indoor cameras: Ideal for monitoring the inside of your property.
- Outdoor cameras: Weather-resistant for external use.
- Smart cameras: Feature motion detection and smartphone connectivity.
Visit CCTV Wise to explore top-quality options.
Step 3: Install the Cameras
- Mount the camera: Use the drill to secure the camera’s mounting bracket to the wall. Ensure it’s stable and aligned properly.
- Run the cables (if wired): Connect the camera to a power source and the recording device. Use cable clips to keep wires organized.
- Adjust the angle: Position the camera to cover the desired area and minimize blind spots.
- Secure the connections: Double-check all connections to avoid disruptions in the feed.
Step 4: Connect the System
- For wired systems: Connect the cameras to the DVR or NVR using the provided cables.
- For wireless systems: Link the cameras to your Wi-Fi network following the manufacturer’s instructions.
- Access the live feed on your smartphone, tablet, or computer to test the connection.
Step 5: Test and Optimize
Once the cameras are installed, test the system thoroughly:
- Check the video quality.
- Test motion detection and night vision.
- Confirm remote access via the app or software.
Make adjustments to the angles or settings to optimize coverage and performance.
Step 6: Maintain Your Security Cameras
Regular maintenance ensures your security cameras function effectively:
- Clean the lenses to prevent dirt or debris from obstructing the view.
- Inspect wiring and connections periodically.
- Update the software or firmware as recommended.
Conclusion
Installing a security camera system yourself doesn’t have to be intimidating. With proper planning and the right tools, you can secure your home or business in no time. For high-quality security cameras and accessories, visit CCTV Wise today.
Take charge of your safety with a DIY approach and enjoy peace of mind knowing you’re protected.